

If you’re working in distributed systems, having a good terminal setup is pretty important! On MacOS iTerm2 is a popular choice. It has tabs, autocomplete, a built-in password manager and a fantastic screen splitting feature. If however you’re like me and aren’t using a Mac it can be difficult to find a replacement that fits your needs. Tmux is here to help!
Introducing Tmux
Tmux is an extremely powerful terminal solution for Unix-like operating systems, but it has a steep learning curve. Getting used to Tmux takes some effort but after spending some time with it, I’ve found that it’s well worth the effort.
Installing and running Tmux is easy enough, simply use sudo apt install tmux on Linux or brew install tmux if you’re on a Mac, then enter tmux and you’re good to go. You’ll see a status bar at the bottom of the terminal window once you launch your first session letting you know Tmux is running.
To get started, let’s go over the two most important features in Tmux: panes and windows.
Tmux Panes
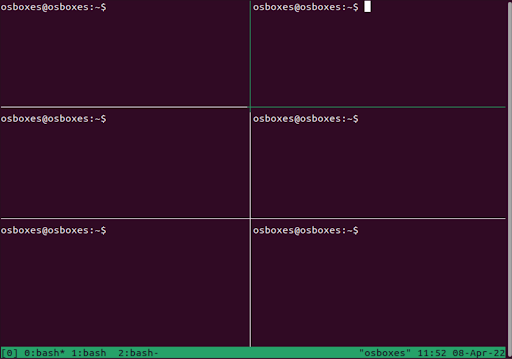
Tmux panes are essentially individual terminals that are created when you split a single terminal in Tmux. For example, here is a Tmux session with six panes open:
In order to navigate between panes, first you’ll need to understand a little bit about how Tmux commands work.
All commands in Tmux are preceded by the command key. By default this is control-b. To change which pane you are on you would use <command key> <arrow key>, which means to go to the pane below you (provided there is one), you would press control-b, then the down arrow (↓). To split a pane vertically press <command key> %; to split a pane horizontally press <command key> " (using a double quote). You can also cycle through different organizations of panes using <command key> <space>.
Tmux Windows
You can think of a window as a new tab in your Tmux session; windows are essentially a collection of panes. To create a new window, press <command key> c. To switch between different windows you can use <command key> <n>, where n is the window number, zero-indexed (so if you have two windows open, ‘n’ would either be 0 or 1). You can also use <command key> p or <command key> n to go to the previous or next window respectively. <command key> w will bring up an interactive list of windows for you to choose from.
Automating Tmux
Once you get a handle on panes and windows, you might start thinking about how you can automate them. For instance, if you have a pane/window configuration you use frequently, it might be helpful to create a script to do the setup for you. Tmux allows several commands to be used in bash scripts, but because of the complexity of a Tmux setup, creating a bash script to automate it all can be a tedious process. Fortunately there is an alternative.
Tmuxinator
Tmuxinator is a program that uses YAML files to automate Tmux setups. I’ve found using Tmuxinator to be incredibly helpful and couldn’t imagine using Tmux without it. With a pretty simple YAML file you can do some pretty complex things in Tmux.
Let’s look at an example program and how you might create a Tmuxinator setup for it. I’ve created an example program in Golang using Protocol Buffers and Contexts to send messages around a ring of multiple servers. You can find that code here if you’d like to play around with it yourself, but to go over the basics of the program we have various flags:
	serverOrClient = flag.String("s", "server", "Is the program a server or client")
	port           = flag.Int64("p", 9000, "The Server's Port number")
	name           = flag.String("n", "DefaultName", "The Server's name")
	terminalNode   = flag.Bool("t", false, "If the node is the last on the ring")
	firstHop       = flag.Int64("f", 9001, "The client's first port to visit")
	timeOut        = flag.Int64("d", 10, "Timeout time in seconds")
These flags specify whether the program is a server or client, its port number, name, whether it is the last node in the circle, etc. By creating a client on a port, and then several servers on subsequent ports, the client will send a message that will be passed along to each server in the chain until it reaches the last server, at which point the message will be returned to the client.
Now let’s take a look at the Tmuxinator file that will set this program up.
# ~/.tmuxinator/ring.yml

name: ring
root: ~/go/src/context_ring/

windows:
  - ring:
      layout: main-vertical
      panes:
      - server_1:
         - go run context_server/main.go -s server -p 9001 -n server_1
      - server_2:
         - go run context_server/main.go -s server -p 9002 -n server_2
      - server_3:
         - go run context_server/main.go -s server -p 9003 -n server_3
      - server_4:
         - go run context_server/main.go -s server -p 9004 -n server_4
      - server_5:
         - go run context_server/main.go -s server -p 9005 -n server_5 -t true
      - client:
         - tmux select-pane -t 5
Tmuxinator configurations are located under the .tmuxinator directory in each user’s home directory. As you can see, it is fairly simple to create windows and panes, executing a sequence of commands in each of them.
At the highest level, Tmuxinator describes one or more windows. In the file we are looking at above, we describe a window, named ring, and give it a layout. The first two lines give the configuration a name and specify where the setup’s root directory will be. There are five main layout options in Tmuxinator, even-horizontal, even-vertical, main-horizontal, main-vertical and tiled (which you can see above). Next, you name each pane that you want created and give a list of commands to be run in each pane when it is created, and that’s it!
Now go have fun Tmuxinating!